
Almost every time I write a beauty post I seem to start it by saying GOD I NEVER WRITE BEAUTY POSTS which I’ve just realised might give the impression I don’t really care about beauty. That actually couldn’t be further from the truth! I LOVE beauty products. It’s actually one of the areas I’m far more likely to be less frugal in, because there is just something so luxurious about treating yourself to a Chanel lippie or some Tom Ford perfume, a feeling you don’t often get on an average shopping trip (I’m sure plenty of people do if they can afford copious pairs of Louboutins and Chloe handbags, but sadly, that just ain’t me…) Make-up fascinated me from an early age, and it continues to do so. But life gets in the way. Time seems to whizz by so quickly, and to be frank I err on the side of lazy, so since I already spend a decent amount of my getting ready time putting together outfits, something had to give. I’m just not cut out to be one of those girls who has both perfectly matching accessories AND flawless contouring! That’s probably why the one area I do tend to be a little more creative in is my nails – once it’s on there, it’s going to stay there, at least for a little while, so I can show off my girly side without having to, you know, make a daily effort!
So here is my latest attempt! My favourite thing about this look is it looks as though it’s quite complex, but in fact it is incredibly easy – all you need is a steady hand and a little patience!

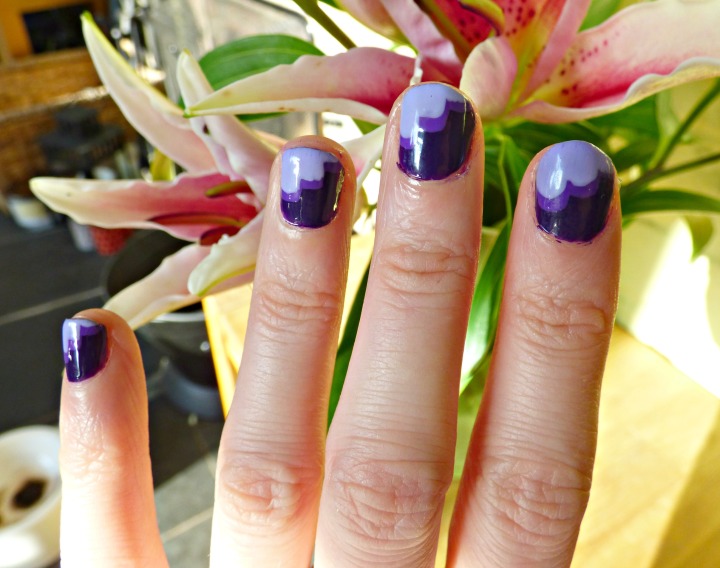
You’ll need to first select 3 colours (or more if you have a lot of time to spare!) – I’ve gone with three in the same colour palette here, but you can go nuts with whatever combo you like! After a base coat, I painted the nail in my first shade. Once that was completely dry I added the second layer, starting with a single stroke of the second shade, starting around half way down the nail. I then added a second stroke next to it a couple of millimeters higher, and again until I’d reached the other side. Once that had completely dried I finished the look by adding the final layer in the last shade, repeating the second layer, but again a couple of millimetres higher up the nail so that the second layer was visible. I finished off with a gel top coat, and that was basically it! A fair amount of hanging around waiting for coats to dry, but otherwise a very simple technique for a striking design that looks a lot more complicated!
I say simple – there is a reason you are only looking at my left hand in these photos. I’m going to go ahead and admit that not being ambidextrous, painting the right hand was a bit more of a challenge and not quite so successful. Still, one out of two isn’t bad…..
Love,


Awesome! So creative!
LikeLiked by 1 person
Thank you! x
LikeLiked by 1 person
So pretty & very different too – love them! x
LikeLiked by 1 person
Thanks, and so easy! x
LikeLiked by 1 person
Your nails are woow😘❤
Check out my new post.. Its on tips to dress gorgeously for school.. You will love it..
https://tinutrends.wordpress.com/2018/05/05/the-back-to-school-look/
LikeLiked by 1 person
Thank you! x
LikeLike
So pretty!
LikeLiked by 1 person
Thanks! x
LikeLike